Tubeless makes more sense on Indian roads than it does almost anywhere else. The thorns that line every rural shoulder, the loose granite chips thrown off fresh chip seal, the glass that collects at every junction: these are exactly the punctures sealant handles without you stopping. What tubeless does not do is survive neglect, and Indian heat punishes neglect faster than European weather ever will.
This guide covers converting a tubeless-ready wheelset, sizing the parts correctly, seating a bead without a compressor, and the maintenance interval that actually applies in 38 degree heat rather than the one printed on the bottle.
Why tubeless suits Indian roads specifically
The case for tubeless usually gets made in terms of rolling resistance and comfort. Both are real, but neither is the reason to convert here.
The reason is thorn punctures. Acacia and babool thorns collect on the shoulder of every state highway in Telangana, Karnataka and Maharashtra, and they are the single most common flat on a long ride out of any Indian city. A thorn makes a hole under 2mm across. Sealant closes that in under two seconds, usually before you notice a pressure drop. On tubes, the same thorn ends your ride at the roadside in 40 degree heat, and you are fixing a puncture in the sun.
Chip seal is the second reason. Freshly laid surfaces shed sharp aggregate for weeks, and those chips cut small slices rather than punching holes. Sealant handles most of them. The third is that lower pressures become safe. On a 28mm tubeless tyre you can run 15 to 20 psi less than the same width with a tube and never risk a pinch flat, which is the difference between a patched Hyderabad service road being tolerable and being exhausting.
What tubeless will not fix
Being clear about this matters more than the sales pitch:
- Sidewall cuts. A stone edge or a broken kerb that opens a 5mm or larger gash in the sidewall will not seal. Sealant sprays out and stops.
- Rim strikes. Tubeless removes pinch flats, not dented rims. A pothole hit hard enough still ruins the wheel.
- Slow leaks at the bead. A poorly taped rim leaks steadily regardless of how much sealant is inside.
- Neglect. Dried sealant is the same as no sealant, and the tyre gives no external sign.
Check the wheels are genuinely tubeless ready
Three different labels get used loosely, and only one of them means you can convert safely.
| Label | What it means | Safe to convert |
|---|---|---|
| Tubeless ready (TLR / TCS / TR) | Bead shelf and hook designed to hold an unsupported bead. Needs tape and sealant. | Yes |
| Tubeless compatible | Vague marketing term. Check the rim manufacturer's own documentation before trusting it. | Verify first |
| Standard clincher | No tubeless bead shelf. The tyre can blow off the rim under pressure. | No |
If the rim is stamped or the wheel came on a bike bought in the last four or five years, it is very likely tubeless ready. If you cannot confirm it, ask before spending on tape and sealant. Our workshop in Kondapur can tell you in thirty seconds by looking at the bead seat.
Hookless rims and the pressure ceiling
Many current road and gravel wheelsets use hookless rims, and this changes one number that matters. Hookless rims are limited to 72.5 psi (5 bar) under the ISO standard, and they require a tubeless tyre approved for hookless use. Exceeding that ceiling risks the tyre coming off the rim. Check the wheel manufacturer's approved tyre list rather than assuming any tubeless tyre will do. Minimum tyre width on hookless is usually 28mm.
What you need
| Part | Why | Roughly |
|---|---|---|
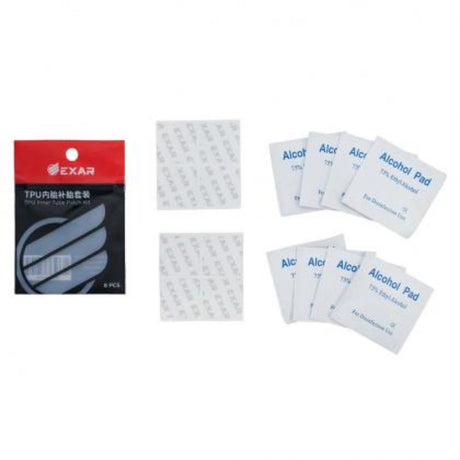
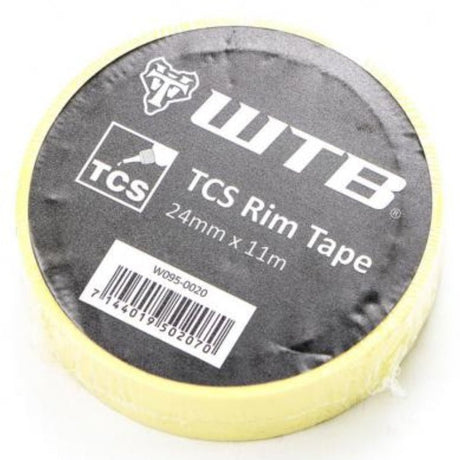
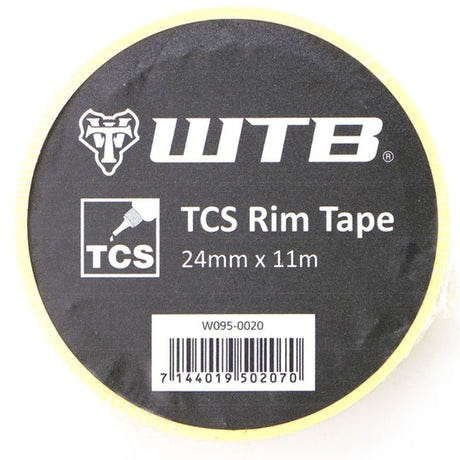
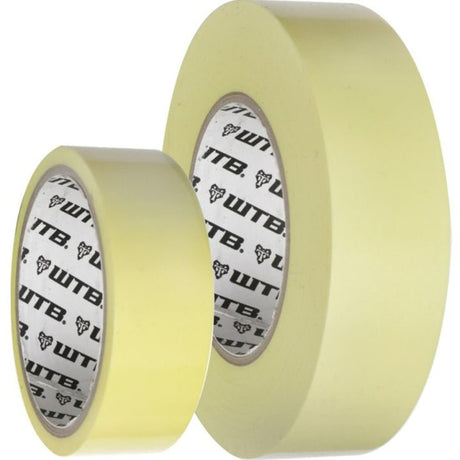
| Tubeless rim tape | Seals the spoke holes. Standard rim strips will not work. | ₹375 to ₹1,500 |
| Tubeless valves | Presta valves with a rubber base that seals against the rim bed. | ₹1,250 to ₹2,600 |
| Sealant | The part that actually stops punctures. | ₹640 to ₹1,200 for a small bottle |
| Tubeless ready tyres | A tubeless casing holds air without a tube. A standard clincher does not. | Varies widely |
| Valve core remover | Needed to inject sealant and to seat a bead with maximum airflow. | Often included with valves |
If you would rather not assemble the parts individually, the Muc-Off Ultimate Tubeless Setup Kit packages tape, valves and sealant matched to either a road and gravel or an XC and trail rim width.
Getting the three sizes right
Most failed conversions are a sizing error, not a technique error.
Tape width
Measure the internal rim width, not the external. Choose tape 2mm wider than that measurement. The tape should climb slightly up both sidewalls of the rim bed without wrinkling.
| Internal rim width | Tape width |
|---|---|
| 17 to 19mm | 21mm |
| 19 to 21mm | 23 to 25mm |
| 21 to 25mm | 25 to 27mm |
| 25 to 30mm (MTB) | 29 to 32mm |
Valve length
The rule is rim depth plus at least 15mm, so the pump head has enough thread to grip. A valve that only just clears the rim will leak air every time you remove the pump.
| Rim depth | Valve length |
|---|---|
| Up to 25mm | 44 to 45mm |
| 25 to 45mm | 60 to 65mm |
| 45 to 65mm | 80 to 85mm |
| Over 65mm | 80mm plus an extender |
Choose a valve with a removable core. It makes injecting sealant and topping up far cleaner, and it is the only way to get enough airflow to seat a stubborn bead. The Panaracer Presta valve with removable core covers 44mm, 60mm and 80mm, and the Lezyne CNC Tubeless Valve Pro is the lighter machined alternative.
Sealant volume
Under-filling is the most common mistake, and in Indian heat you should sit at the upper end of every range rather than the lower.
| Tyre | Sealant per tyre |
|---|---|
| Road, 25 to 32mm | 50 to 60ml |
| Gravel, 35 to 45mm | 70 to 90ml |
| MTB, 2.1 to 2.4 inch | 110 to 130ml |
For road and gravel, Panaracer Seal Smart and WTB TCS are the straightforward choices. Silca Ultimate with Fiberfoam and Schwalbe DOC Blue both hold up well against larger cuts. The full range sits in tubeless setup.
The conversion, step by step
- Strip the rim completely. Remove the tyre, tube and old rim strip. Clean the rim bed with isopropyl alcohol or a dedicated remover so the tape bonds properly. Any grease left behind will lift the tape within weeks.
- Tape it. Start about 100mm before the valve hole, keep the tape under firm tension, and press it into the centre channel as you go. One clean layer is better than two sloppy ones. Overlap the start by roughly 100mm and cut.
- Pierce the valve hole. Use a small sharp point from inside the rim, working outward. Start small and widen only enough for the valve to pass through. A ragged oversized hole leaks.
- Fit the valve. Push it through, seat the rubber base flat, and tighten the lock ring firmly by hand. Do not use pliers, which distorts the seal.
- Mount one bead. Fit the tyre with the second bead left partly off, and check the tyre's rotation arrow now rather than later.
- Add sealant. Either pour it in through the gap in the second bead, or fit both beads, remove the valve core and inject through the valve with a syringe kit. The syringe route is cleaner and lets you measure accurately.
- Seat the bead. With the valve core removed, deliver a fast high volume burst of air. You want to hear two distinct pops as each bead snaps into the rim hook.
- Refit the core, set pressure, shake. Inflate to the tyre's maximum recommended pressure to fully seat, then drop to riding pressure. Spin and shake the wheel horizontally and vertically for a minute so sealant reaches the whole casing.
- Leave it overnight. Check pressure the next morning. A drop of 5 to 10 psi in the first night is normal as sealant finds the porous parts of the casing. A drop to flat is a tape or valve problem, not a sealant problem.
Seating the bead without a compressor
This is the step that stops most home conversions in India, because very few of us have a workshop compressor and dedicated tubeless charger pumps are both expensive and frequently out of stock here.
Four approaches that work, in the order worth trying:
- Set the bead shape first. Fit the tyre with an inner tube, inflate to 40 psi, and leave it overnight. The casing takes on the rim's shape. Next day, deflate, unseat only one bead, pull the tube out, refit that bead and inflate. This single trick converts most tyres that otherwise refuse to seat, and it costs nothing.
- Soapy water on both beads. A thin soap solution brushed onto the bead lets it slide into position with far less air volume. Do this every time, not just when struggling.
- Remove the valve core and use a fast floor pump. Airflow matters more than pressure. A high volume floor pump with the core out and quick full strokes will seat many road and gravel tyres.
- Use a local puncture shop. Almost every neighbourhood in India has a two-wheeler puncture repair shop with a compressor, and their air chuck is Schrader. Carry a Presta to Schrader adaptor and they will seat your bead in seconds for a few rupees. This is the most reliable option in the country and the one nobody writes about.
If the bead still refuses after all four, the tyre and rim combination is likely too loose. Wrapping one extra layer of rim tape increases the effective diameter enough to fix it in most cases.
Pressure after converting
Do not carry your old numbers across. Tubeless removes the pinch flat risk that forced high pressures, and Indian road surfaces reward the lower figure.
As a starting point for a 70kg rider on a 28mm tubeless road tyre with a 21mm internal rim, roughly 62 psi front and 66 psi rear on tarmac. The same rider on a 25mm tyre with a tube would typically have run 90 psi or more. On a 40mm gravel tyre, 32 to 36 psi. On 2.25 inch MTB tyres, 20 to 24 psi.
Adjust from there by feel, and remember the hookless ceiling of 72.5 psi if your rims are hookless. Our guide to what tyre pressure you should actually run works through the calculation properly.
Sealant in Indian heat: the six week rule
This is the section that matters most and the one most riders get wrong.
Sealant bottles typically claim three to four months of service life. Those numbers come from temperate testing. In Indian summer conditions, where a black tyre sitting in direct sun reaches well above ambient temperature, latex based sealant dries out in six to eight weeks. Ammonia carriers evaporate faster as temperature rises, and a bike parked on a balcony or in a metal shed accelerates it further.
A dried out tyre looks completely normal from the outside. It holds pressure, it rides normally, and it fails at the first thorn.
A maintenance rhythm that works here
- Every six weeks in summer, every ten in winter: check the sealant level and top up.
- Checking without unseating the tyre: deflate, remove the valve core, and pass a zip tie or a thin spoke through the valve, then withdraw it and look for wet sealant. Alternatively, a Milkit check and refill kit measures the level through the valve without losing air at all.
- Top up rather than refill. Adding 30 to 40ml is usually enough. A full strip and clean is worth doing about once a year.
- If the bike sits idle through the monsoon, spin both wheels once a week. Sealant pools at the bottom of a stationary tyre and dries into a solid lump, which then rattles and does nothing. The rest of the wet season routine is in our monsoon bike maintenance guide.
- Do not leave dried sealant on aluminium for a year or more. Ammonia based formulas can corrode aluminium spoke nipples and rim beds over long periods.
Set a recurring reminder. Nobody remembers this by feel, because there is nothing to feel.
What to carry on a ride
Tubeless reduces the number of stops. It does not remove the need to carry a repair kit, and the kit is different from a tubed one.
- A plug kit. This is the critical item. A plug tool with anchors seals cuts between 2mm and 6mm in under a minute without removing the wheel. Options sit in tubeless puncture repair.
- One spare tube, with a valve long enough for your rim depth. When a cut is too large to plug, a tube is the way home. Remove the tubeless valve first, and pull any plug out before fitting the tube.
- Two tyre levers. Tubeless beads sit tighter than clincher beads, particularly after months in the heat.
- A pump or CO2. A mini pump is more dependable on a long ride than cartridges, and electric pumps have become a genuine option for shorter rides.
- A tyre boot, or a folded note, for sidewall gashes that a plug cannot close.
When tubeless is the wrong choice
It is not the right answer for everyone, and pretending otherwise leads to disappointed riders.
If you ride under 50km a week entirely within the city, on smooth surfaces, and your bike sits unused for weeks at a time, tubes are simpler and cheaper. The maintenance interval is the cost of tubeless, and a rider who will not top up sealant every six weeks is worse off than a rider on good tubes. The same applies if your wheels are standard clinchers and converting means new wheels: that money is better spent on better tyres with a strong puncture protection belt.
If you ride beyond the city limits, do brevets, ride gravel, or regularly cover 200km weeks, tubeless is worth the routine.
Frequently asked questions
How much does a tubeless conversion cost in India?
Between ₹2,500 and ₹5,000 per wheelset for tape, valves and sealant, excluding tyres. Rim tape runs ₹375 to ₹1,500 depending on length and width, a pair of valves ₹1,250 to ₹2,600, and a small bottle of sealant ₹640 to ₹1,200. Complete kits that bundle all three sit near the middle of that range. Tubeless ready tyres are the larger cost if your current tyres are standard clinchers.
Does tubeless sealant damage carbon rims?
No, sealant does not harm carbon. The corrosion concern applies to aluminium, where ammonia based latex sealants can attack spoke nipples and the rim bed if left to dry inside for a year or more. Carbon rims are chemically unaffected. On any rim material, the practical risk is dried sealant bonding the tyre bead to the rim, which makes removal harder rather than causing damage. Ammonia free formulas remove the aluminium concern entirely.
Can I fit a normal inner tube in a tubeless tyre if the sealant fails?
Yes, and it is the standard roadside fallback. Remove the tubeless valve from the rim first, or the tube will not seat and the valve stem will foul. Pull out any plugs you have fitted, wipe as much wet sealant from the inside of the casing as you can, and check the inside surface for the thorn or chip that caused the flat. A tube against wet sealant works fine for the ride home but should be replaced afterwards.
Do I need to clean out old sealant before topping up?
Not for a routine top up. Adding 30 to 40ml on top of the existing sealant every six to eight weeks is the normal practice, and dried latex flakes cause no harm in small quantities. A full strip and clean is worth doing roughly once a year, or whenever you can feel a solid lump moving inside the tyre as you spin the wheel. That lump is dried sealant that has stopped working and is now only adding rotating weight.
Is tubeless worth it if I only ride inside the city?
Usually not, if that is genuinely all you do. City riding on smooth surfaces produces fewer thorn punctures, and the six to eight week sealant maintenance cycle becomes work with little return. Good tyres with a puncture protection belt and standard tubes are simpler and cheaper for that use. Tubeless earns its keep once you are riding beyond the city limits, on gravel, or covering long distances where a roadside stop matters.
Getting it done for you
If you would rather not do the conversion at home, our workshop in Kondapur handles tubeless conversions, checks that your rims are genuinely tubeless ready before charging you for parts, and seats beads with proper equipment. Bring the wheels or the whole bike. If you have questions about your specific rim and tyre combination, ask TBA Guide and we will tell you what fits.