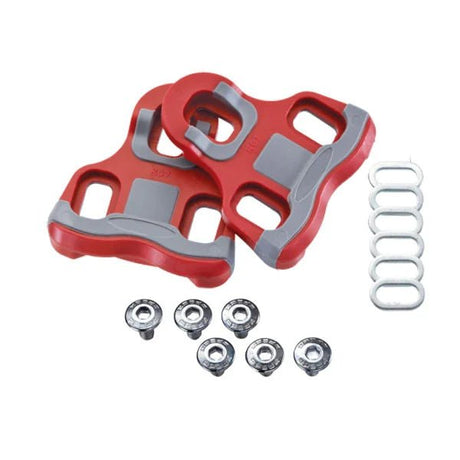
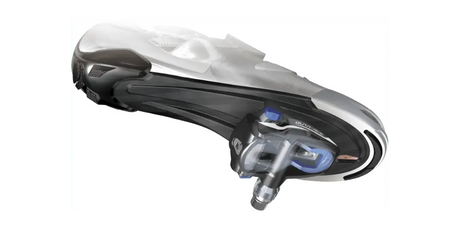
Short answer: set each cleat so the pedal axle sits under, or a few millimetres behind, the ball of your foot, angle it to match the way your foot naturally points, and set the width so your knees track straight over your feet. Start with cleats that allow some float, such as Shimano's yellow 6° SPD-SL cleats, tighten the bolts to the maker's torque, then test on an indoor trainer before a long ride. New road cleats cost from ₹1,095.
Cleats are the only fixed contact between you and the bike that you set up yourself, and a few millimetres or degrees out is enough to cause knee pain, hot feet or numb toes. This guide covers the three adjustments, how much float you need, a step-by-step setup you can do at home, and when to hand it over to a bike fitter.
- The three cleat adjustments
- Fore and aft: where the ball of your foot goes
- Rotation: matching your foot angle
- Stance width
- Float: how much do you need?
- Step-by-step setup at home
- Worn cleats and when to replace them
- FAQ
- Getting your cleats right
The three cleat adjustments
| Adjustment | What it changes | If it is wrong |
|---|---|---|
| Fore and aft | Where the pedal axle sits under your foot | Calf strain, hot spots, numb toes |
| Rotation | The angle your foot points: toes in or out | Knee pain on the inside or outside of the knee, heel hitting the crank |
| Width | How far your feet sit from the crank arms | Knees moving in or out, hip discomfort |
Which cleat fits which pedal is a separate question, covered in our pedal and cleat compatibility guide. This guide is about positioning the cleat you already have.
Fore and aft: where the ball of your foot goes
The usual starting point is to put the pedal axle directly under the ball of your foot, the bony joint at the base of your big toe, or a few millimetres behind it.
- Further forward: a more powerful feel for sprints, but more work for the calves and more risk of hot spots.
- Further back: less calf load and more stability, which suits long rides, brevets and triathlon, where you need your calves for the run.
Most riders end up in the middle, a few millimetres behind the ball of the foot. Move in small steps of 2 to 3mm.
Rotation: matching your foot angle
Most people's feet point slightly outwards when relaxed, and some point straight ahead or inwards. Your cleat angle should match that natural angle so your knee is not twisted on every pedal stroke.
To find yours, sit on a high table with your legs hanging loosely and look at the angle of your feet. Set the cleats so your shoes point the same way on the pedals. Check that your heel does not touch the crank arm or chainstay as you pedal, which often happens to riders whose heels turn in.
Stance width
Sliding the cleat towards the inside of the shoe moves your foot further from the bike, and sliding it to the outside moves it closer. Viewed from the front, your knee should move straight up and down over your foot. Riders with wide hips often need a wider stance. If the cleat runs out of adjustment, some pedals come with longer axle options, and Speedplay pedals let you set width directly.
Float: how much do you need?
Float is how far your heel can swing side to side before the cleat releases. A little float lets your knee find its own path, and most riders are more comfortable with some.
| System | Cleat colour and float |
|---|---|
| Shimano SPD-SL | Yellow 6°, blue 2°, red 0° (fixed) |
| Look Keo | Red 9°, grey 4.5°, black 0° (fixed) |
| Shimano SPD (MTB) | About 4° on the standard cleats |
Start with yellow SPD-SL or grey Keo cleats unless a bike fitter has told you otherwise. Fixed cleats only work if they are set exactly right, and a small error then goes straight to your knees.
| Cleat | Fits | Price |
|---|---|---|
| Wellgo RC-9B | Shimano SPD-SL pedals | ₹1,095 |
| Wellgo RC-7A | Look Keo pedals | ₹1,095 |
| Shimano SPD-SL Road Cleats | Shimano SPD-SL pedals | ₹1,310 |
| Xpedo Sonic 9 (4°) | Shimano SPD-SL pedals | ₹1,650 |
| Xpedo Thrust 7 (6°) | Look Keo pedals | ₹1,650 |
| Look Keo Grip Cleats | Look Keo pedals | ₹2,070 |
| Wellgo 98A | Shimano SPD (MTB) pedals | ₹1,095 |
Browse all cleats. Prices are indicative and move with exchange rates and import duty.
Step-by-step setup at home
- Mark the ball of your foot. With the shoe on, feel for the bony bump behind your big toe and mark it on the side of the shoe with tape. Do the same for the bump behind your little toe, and draw a line between the two.
- Fit the cleat loosely. Put a little grease on the bolt threads and fit the cleat so it can still move. Line up the cleat's centre marks with your line, or a few millimetres behind it.
- Set the angle. Rotate the cleat to match the natural foot angle you found sitting on the table.
- Set the width. Start in the middle of the cleat's range unless you know you need a wider or narrower stance.
- Tighten. Tighten the bolts evenly to the maker's torque, typically 4 to 6 Nm, with a torque wrench.
- Test on a trainer. Ride for 20 minutes and watch your knees from the front in a mirror or on a phone video. Your knees should move straight up and down, and your heels should not touch the cranks.
- Ride and adjust. After a few rides, adjust one thing at a time in small steps. If you move the cleats back, lower the saddle by a few millimetres to compensate.
Before you remove old cleats, trace around them with a marker so you can fit the new ones in exactly the same place. Our saddle height guide and signs your bike fit is wrong cover what to check next.
Worn cleats and when to replace them
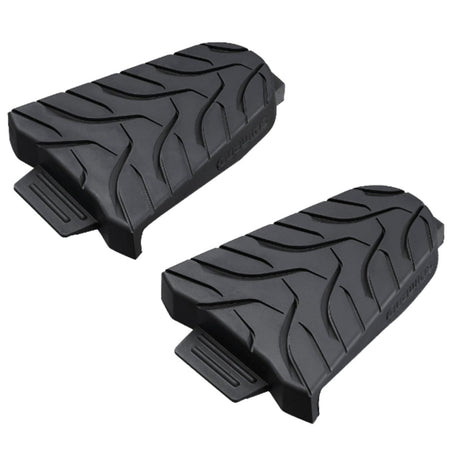
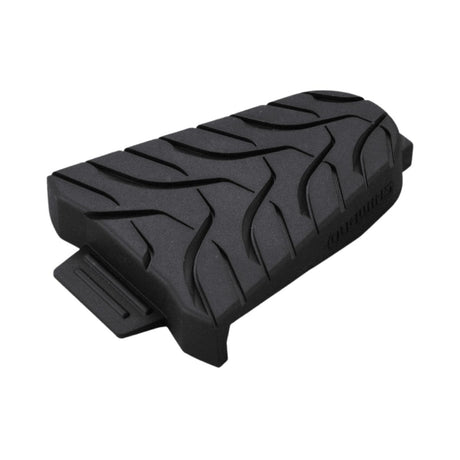
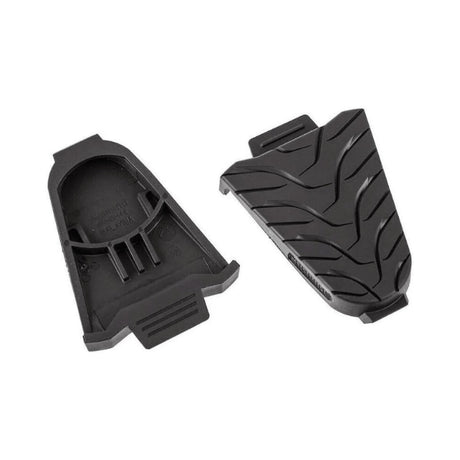
Road cleats wear fastest when you walk in them. Worn cleats release unexpectedly, feel loose or rock on the pedal, and that movement can cause knee pain of its own. Many road cleats have wear indicators, so replace them once those wear through, or when clipping in feels vague. Shimano SM-SH45 cleat covers (₹1,480) protect SPD-SL cleats when you walk into a café or the office.
FAQ
Where should cleats be positioned on cycling shoes?
Cleats should be positioned so the pedal axle sits directly under the ball of your foot, the joint at the base of the big toe, or a few millimetres behind it, with the cleat angled to match your natural foot angle and set wide enough that your knees track straight over your feet when you pedal. Riders doing long distances often move cleats slightly further back. Make changes in steps of 2 to 3mm and test each one.
What is cleat float and how much do I need?
Cleat float is how many degrees your heel can swing in or out before the cleat starts to release, and most riders should start with about 4.5 to 6 degrees, which means yellow Shimano SPD-SL or grey Look Keo cleats, because that freedom lets the knee follow its natural path and protects it from small setup errors. Fixed cleats with no float suit only riders with a professional fit. Too much float can feel vague and unstable.
How do I know if my cleats are set up wrong?
Signs of badly set cleats include pain on the inside or outside of the knee, hot spots or numbness under the ball of the foot, a heel rubbing the crank arm and one knee moving sideways as you pedal, which usually point to the cleat angle, width or fore and aft position. Change one setting at a time. Persistent knee pain needs a professional bike fit.
How often should you replace road cleats?
Most riders replace road cleats every six to twelve months, but the real guide is wear, because walking on them wears the plastic quickly, so replace them as soon as the wear indicators are gone, the cleat feels loose or rocks on the pedal, or clipping in and out becomes vague or unpredictable. Cleat covers help them last longer. Trace the old cleat position on the shoe before removing them.
Do I need to change saddle height after moving my cleats?
Yes, often, because moving the cleats back towards the heel effectively shortens your leg's reach to the pedal, so most riders lower the saddle by a few millimetres after moving cleats rearwards and raise it slightly after moving them forwards, keeping the same knee bend at the bottom of the stroke. Make one change at a time. Check your saddle height again after any cleat change of more than 3mm.
Getting your cleats right
If you have knee pain, very different feet, or a leg length difference, a professional fit saves a lot of trial and error. See our bike fit service, or tell us your shoes, pedals and any discomfort and ask TBA Guide how to set up your cleats.