The bike survives the flight. What usually does not survive is the rear derailleur hanger, and almost nobody thinks about it until they open the bag at the other end and find the derailleur bent into the spokes.
Flying with a bicycle is not difficult, but it rewards preparation in a way that very little else in cycling does. Get the packing right and your bike arrives ready to ride. Get it wrong and you spend the first day of your trip finding a workshop.
Choosing a bag comes down to two separate questions, and most guides only cover the first.
Question one: hard case or soft bag?
| Hard case | Soft bag | |
|---|---|---|
| Protection | Higher. Rigid shell absorbs impact directly. | Depends on internal structure and how you pack it. |
| Weight | Heavier, eats into your allowance | Lighter, more of the allowance is bike |
| Storage at home | Bulky, does not collapse | Folds down considerably |
| Storage at destination | Awkward in a hotel room | Slides under a bed |
| Handling | Wheels and rigid handles, easy to move | Varies by bag |
| Cost | Lower for equivalent size | Higher at the premium end |
Weight matters more than people expect. A heavy hard case plus a bike can push you past the airline limit before you have packed a single tool, and excess baggage on that scale is expensive.
One correction to the usual advice: a good soft bag is not automatically less protective. The premium ones have a rigid internal frame that the bike mounts to, so impact travels through the structure rather than into the bike. That is a very different thing from a padded bag with no skeleton.
Question two: how much do you have to take apart?
This is the question that actually decides whether you enjoy travelling with a bike, and it is the reason most of our customers end up where they do.
| Approach | What comes off | What stays on | Packing time |
|---|---|---|---|
| Frame-mount soft bag | Wheels, pedals, rear derailleur | Handlebars, seatpost, saddle | 15 to 20 minutes |
| Hard case or padded bag | Wheels, pedals, derailleur, handlebars, seatpost | Very little | 45 to 60 minutes |
Handlebars and seatpost staying attached is the whole story. Those are the two things that take longest to remove, and more importantly the two things you have to set up again correctly at the other end. Bar angle, brake lever position, saddle height, saddle fore and aft. Get any of them slightly wrong and you notice it for the first hour of riding.
Twenty minutes against an hour does not sound like much until you are doing it in a hotel room at midnight before an early flight. Over a week-long trip you do it twice.
Choosing a bag
Scicon AeroComfort: the one most of our customers buy
The Scicon AeroComfort 3.0 is what riders who fly regularly tend to settle on, and the reason is packing rather than protection.
The bike mounts by its dropouts onto an internal frame inside the bag, so it is held rigid without needing a hard shell around it. You take off the wheels, the pedals and the rear derailleur, and that is it. Handlebars stay on. Seatpost and saddle stay exactly where you set them. Nothing to measure, nothing to re-torque, nothing to get subtly wrong at 11pm in a hotel room.
Wheels go into padded compartments on either side, genuinely separated from the frame, which removes the most common cause of spoke and rotor damage.
There is a triathlon version built for TT frames and aero cockpits, which are precisely the bikes you least want to dismantle and reassemble.
Two things worth knowing. It is a soft shell, so protection depends on the internal frame doing its job and on you packing the gaps properly. And it is the most expensive route. A derailleur protector hood is worth adding for the hanger area, and a spare core hub cup is cheap insurance since those are the parts that clamp your dropouts.
Evoc Bike Bag Pro: more protection, similar convenience
The Evoc Bike Bag Pro works on the same principle, with the bike mounted to a rigid internal frame so you are not stripping it down. Wheels, pedals and derailleur come off, the rest stays.
Where it differs is padding and structure. It is built to take a harder knock than a lighter frame-mount bag, which makes it the choice if you want closer to hard-case protection without the weight penalty or the storage problem. There is an Evoc Pro TT/Road version for time trial frames.
Between the two, it comes down to whether you weight convenience or impact protection slightly higher. Both are far quicker to live with than a hard case.
Hard cases and padded bags: most protection per rupee
If the premium bags are beyond your budget, or you want outright impact protection above all, this is where to look. You will be taking the bike properly apart, including handlebars and seatpost, so allow the hour.
The XXF E0901 is a moulded EVA hard case for 27.5in mountain bikes. On the soft side, the XXF N1808 covers road and TT frames, with the N1602 and N2025 road-specific. All sit well below the premium bags on price. The 29er hard case moves in and out of stock, so check the full range for other frame sizes.
If you fly once a year and the alternative is a cardboard box from a bike shop, the PE012 tarpaulin bag is a large step up for very little money. It has no internal structure, so pack it with real care.
Quick answer
| If you | Then |
|---|---|
| Fly several times a year | Scicon AeroComfort. Packing time is the whole point. |
| Want the protection but not the disassembly | Evoc Bike Bag Pro. |
| Ride a TT or triathlon bike | Either, in the triathlon or TT version. |
| Fly once or twice a year on a budget | XXF hard case or padded bag, and pack carefully. |
| Have nowhere to store a rigid case | Any soft bag. They fold flat. |
| Are choosing between a cheap bag and a cardboard box | The cheap bag, comfortably. |
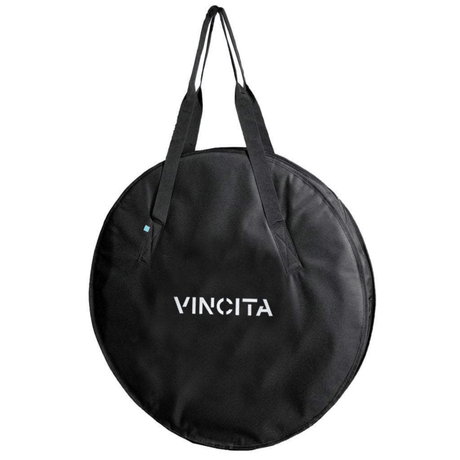
Whichever you choose, if it does not have dedicated wheel compartments, add a wheel bag. Keeping wheels genuinely separate from the frame prevents the most avoidable damage there is.
What actually gets damaged
After enough bikes have come back through the workshop, the pattern is consistent.
The rear derailleur and hanger. By a wide margin the most common damage. The derailleur sticks out on the side of the bike, and any sideways impact bends the hanger, which is designed to bend so the frame does not. Take it off, whatever bag you are using.
Disc rotors. Thin steel discs, easily bent by a knock, and a bent rotor rubs for the rest of the trip. Either remove them or fit rotor protectors.
Fork and rear dropouts. With the wheels out, nothing stops the dropouts being squeezed together if something heavy lands on the bag. Dropout spacers cost almost nothing. Frame-mount bags solve this by clamping the dropouts to the internal frame.
The down tube and chainstays. The largest, most exposed tubes. Most frame damage in transit lands here, and it is the damage that ends a frame rather than costing a part.
Wheels. Usually from being packed against the frame without separation, so the frame presses into the spokes.
How to pack a bike
This is the full sequence for a hard case or a padded bag. With a frame-mount bag you skip steps 8 and most of 9, which is where the time goes.
1. Clean it first. Not vanity. Several countries have agricultural inspection on arrival and a bike caked in mud can be held. A clean bike also lets you see damage immediately at the other end.
2. Photograph everything. Saddle height, handlebar angle, seatpost insertion. Mark the seatpost with tape before you drop it.
3. Remove the pedals. The left pedal has a reverse thread. Do this while the bike is still stable, not after the wheels are out.
4. Take both wheels out. Deflate the tyres to roughly half pressure. Aircraft holds are pressurised so tyres do not explode, but partial deflation reduces the chance of a rim being forced against something under load, and some airlines ask for it.
5. Remove the rear derailleur. Undo the single bolt at the hanger, leave the cable connected, and tape the derailleur to the chainstay with the chain still through it. This one step prevents most transit damage.
6. Fit dropout spacers, front and rear. These hold the dropouts at the correct width. Most bags include them.
7. Deal with the rotors. Remove them and pack flat, or fit rotor protectors. Also slide a pad spacer into each caliper, because a lever squeezed with no rotor between the pads closes the pistons and you will be prising them apart on arrival.
8. Handlebars and seatpost. Rotate the bars parallel to the frame, or remove the stem faceplate and tape the bars alongside the top tube. Do not let the shifters hang loose. Drop or remove the seatpost, having marked the height.
9. Pad the frame. Pipe insulation from any hardware shop is cheap and ideal. Cover the down tube, top tube, chainstays and fork legs, and anywhere two parts can touch, because vibration over several hours will rub paint through.
10. Separate the wheels from the frame. Use the bag's compartments if it has them, or put something rigid between.
11. Fill the gaps. Kit, shoes, helmet, a towel. Anything that moves inside the bag will keep moving for the whole journey. A tightly packed bag protects better than a half empty one.
12. Weigh it before you leave. A bathroom scale is close enough. Finding out at the counter is an expensive way to learn.
Airlines, and what to ask
Policies vary widely and change often, so check with your specific carrier rather than trusting a forum post. What to establish, in this order:
- Does the bike count as standard checked baggage or as special or oversized? This determines everything else.
- What is the weight limit, and is there a separate one for oversized items? Commonly 23kg or 32kg, but not universal.
- What is the linear dimension limit? Length plus width plus height. Larger cases can exceed it.
- Does it need declaring in advance? Many carriers require notice and some cap bikes per flight.
- What is the fee? Anything from nothing to a very large number depending on airline and route.
Two practical notes. Domestic Indian carriers are generally more relaxed than international ones if you are inside the weight and size limits. And on connecting flights the operating carrier for each leg can have different rules, so check both.
Get the answer in writing where you can. A screenshot of the policy page has settled more than one disagreement at a check-in desk.
At the other end
Open the bag before you leave the airport, or at least before you leave the taxi rank. Damage claims are considerably easier when raised immediately, and airlines routinely refuse them once you have taken the bag away.
Check the frame first, particularly the down tube and chainstays. Then derailleur hanger alignment, then rotors. Reassemble somewhere with space and light, and torque the stem, bars and seatpost properly rather than by feel. Ride a short loop before you commit to anything long.
If something has gone wrong, photograph it before you touch it.
Not sure which suits your bike and how you travel? Bring the bike to the shop in Kondapur, or ask TBA Guide with your frame size and where you are flying.
FAQ
Can you take CO2 cartridges on a plane?
Generally no. Most airlines prohibit CO2 cartridges in checked baggage entirely and restrict or ban them in cabin baggage too. Do not pack them inside your bike bag. Buy cartridges at your destination, and carry a hand pump or an electric pump for the trip instead.
Does travel insurance cover bike damage in transit?
Standard travel insurance usually will not. Most policies either exclude sports equipment or cap it at a figure well below the value of a road bike. You need a policy with specific bicycle cover, or an extension to home contents insurance that covers the bike away from home and in transit.
How much does a packed bike weigh?
A road bike in a soft bag typically comes to 15 to 18kg total, and 18 to 22kg in a hard case. Since most airline limits are 23kg or 32kg, the case itself often decides whether you are inside the allowance. Weigh it at home before you travel.
Can you take a bicycle on Indian trains?
Yes. Indian Railways carries bicycles as registered luggage in the brake van. Book it at the parcel office at least a few hours before departure, with your ticket and ID. It is considerably cheaper than flying and avoids the packing requirements entirely, though it needs more time at both ends.
Do I need to remove tubeless sealant before flying?
No. Sealant is not affected by altitude and aircraft holds are pressurised, so there is no risk of it being forced out. Deflate the tyres to roughly half pressure as you would with tubes, and lay the wheels flat rather than upright if you can, so sealant pools evenly.
Should I lock my bike bag?
Use a zip tie or a TSA-approved lock rather than a normal padlock. Security may need to open the bag for inspection, and a lock they cannot open will simply be cut off. A zip tie shows if the bag has been opened without preventing a legitimate inspection.
What tools should I pack with my bike?
A multitool with the Allen sizes your bike uses, a pedal spanner or 8mm Allen key, a torque wrench if you have a compact one, plus tyre levers, a spare tube and a pump. Pack the derailleur bolt and any small parts you removed in a labelled bag rather than loose.
Is it cheaper to ship a bike than fly with it?
Sometimes, for domestic trips. Courier services within India can cost less than airline oversized baggage fees, particularly on carriers that charge heavily. The tradeoff is timing, since you need to send it several days ahead and trust the handling, and insurance cover is usually worth adding.